


1.Intraoral Scanning & Design
1.1 Intraoral Scanning
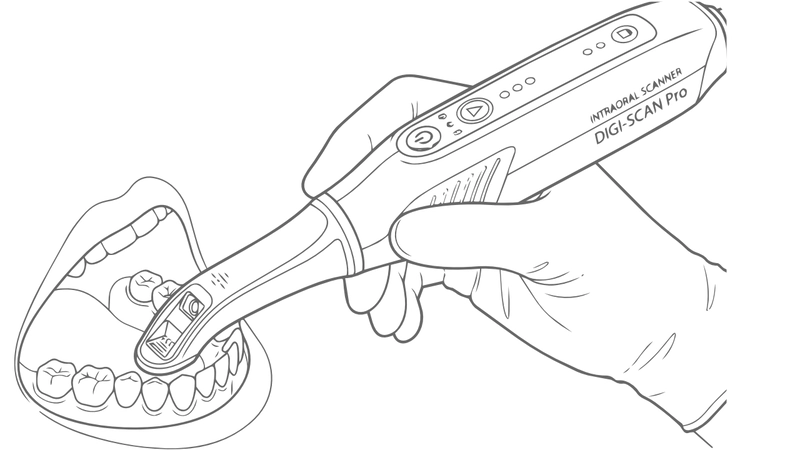
Notice:
· Clear Margin
· Proper Occlusion
· Sufficient Space
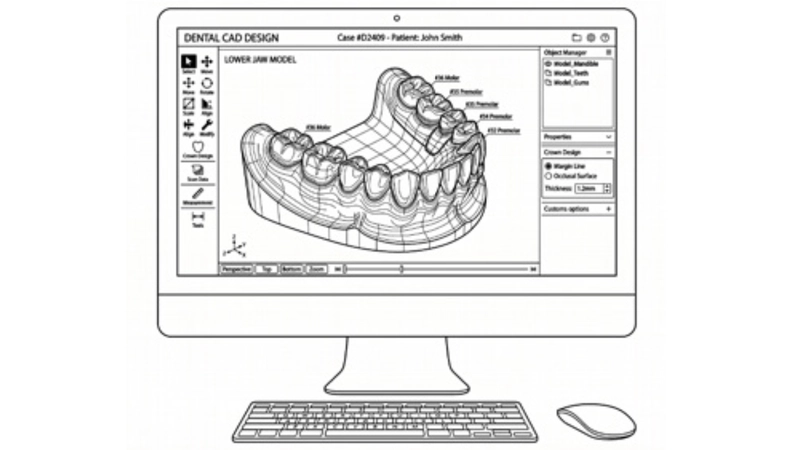
Notice:
· Accurate Margin-line
· Optimal Contacts
· Adequate Clearance
1.2 Design
2.Slicing & Printing
2.1 Slicing
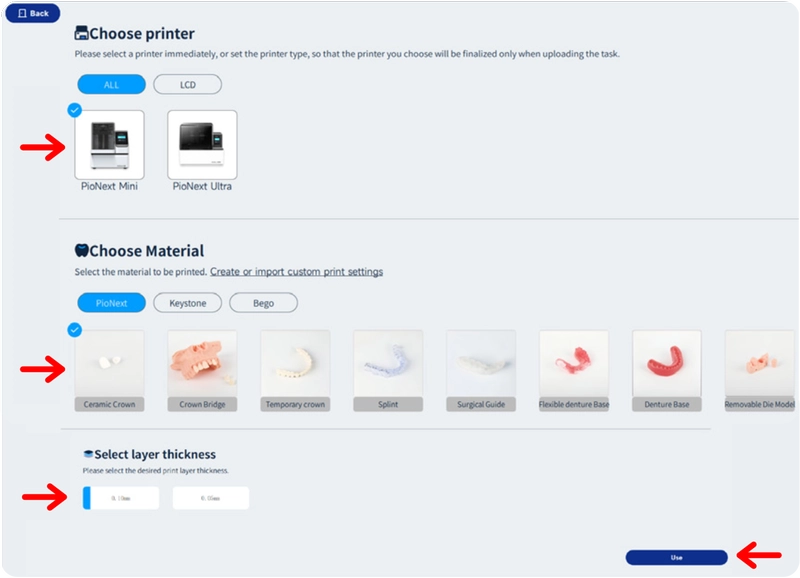
① Printer and Material Selection
→ Open the PioNext Box software
→ Select the【PioNext Mini】 and choose【Ceramic Crown】
→ Choose the 【Select layer thickness】 and click【Use】
PioNext Box comes with built-in printing parameters, covering a wide range of indications, including fixed, removable, implant, and aesthetic restorations
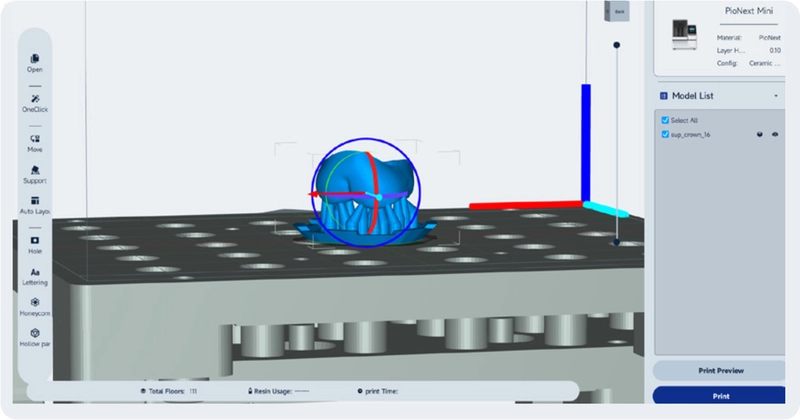
② Orient Models
→ Click 【Auto Add Supports】
Note: Arrange supports in non-critical areas, such as the buccal side, occlusal surface or other polishable surfaces
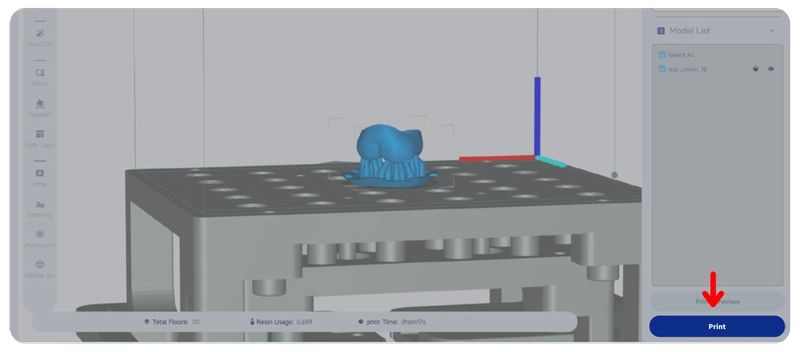
③ Slicing
→ Click “Print” in the lower-right corner to generate the sliced file
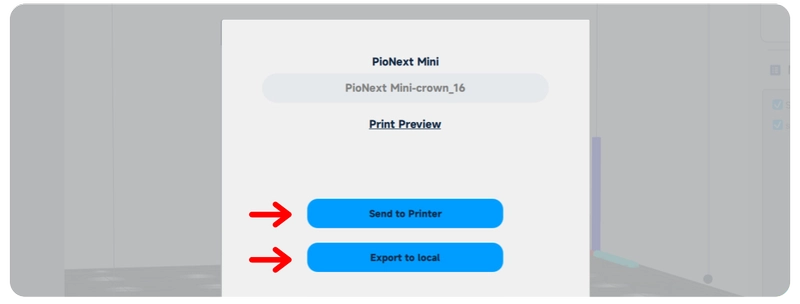
④ Export Sliced File
→ Method 1: Export the file directly to a USB drive
→ Method 2: Send the file to the printer via WLAN
2.2 Printing
① Preparation
→ Before printing, check the LCD screen and vat release film for damage
→ Ensure the build platform is clean and free of residual resin
→ Shake the resin, then pour it into the vat without exceeding the MAX level
→ Tap 【Print】 , select the file, and import
Via WLAN: Tap 【Print】, choose the target file, download and start printing
Via USB Drive: Insert the USB drive, tap 【Print】 select the target file and download it, then start printing
② Quick Release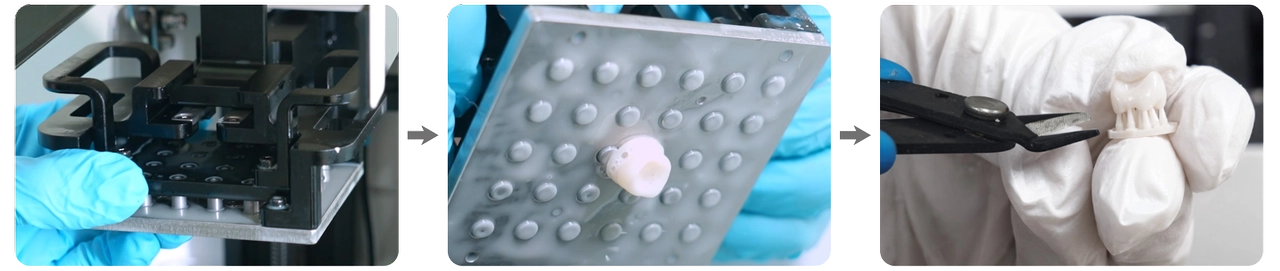
→ Remove the build platform after printing is finished
→ Press both ends of the platform to quickly release the model
→ Remove the supports
3.Post-processing
3.1 Cleaning
① Prepare cleaning tools

Preparation
- Medical cotton swabs
- Disposable micro applicators
- Non-woven wipes
Note: Note: Do not immerse the ceramic crown in alcohol, as this may cause ceramic filler precipitation and affect the final restoration quality
② Cleaning Procedure
Medical cotton swabs, disposable micro applicators, and non-woven wipes should be moistened with alcohol before use to clean the restoration

Initial Cleaning
Use an alcohol-moistened medical cotton swab to roughly clean the outer surface and inner surface
Detailed Cleaning
Use an alcohol-moistened disposable micro applicator to carefully clean the inner surface and occlusal fossa
Final Cleaning
Use an alcohol-moistened non-woven wipe to thoroughly clean all areas of the restoration
Cleaning complete
3.2 Curing
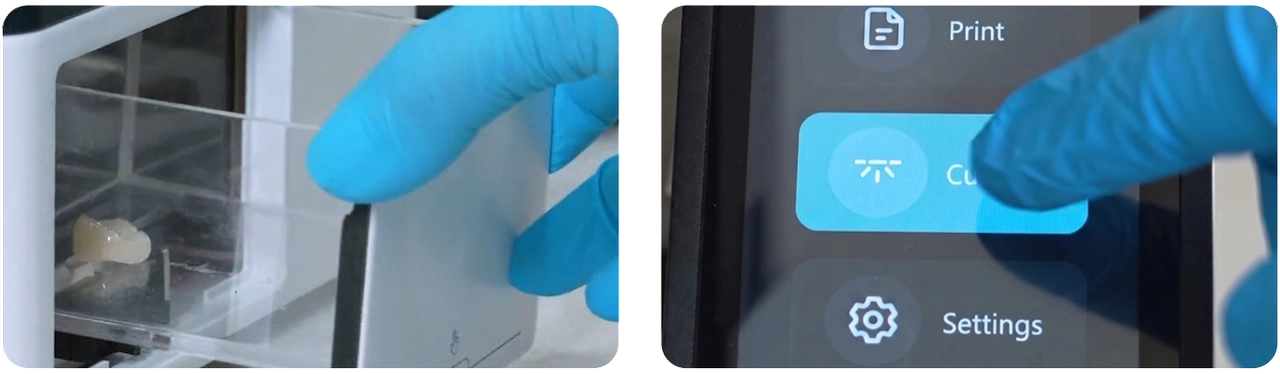
Curing using the PioNext Mini Curing Unit Parameter Settings: PMW 50% 1.5 min
Note: These parameter settings are applicable to PioNext ceramic crown resin, for reference only
3.3 Grinding
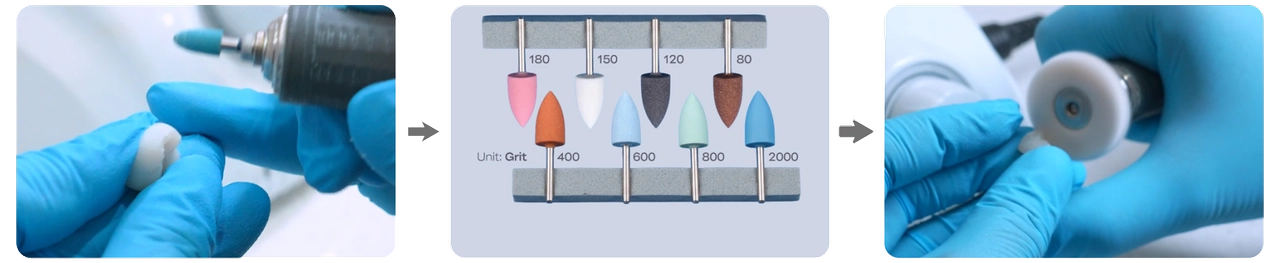
Rough Grinding
Remove excess material and preliminarily refine the crown morphology
Fine Finishing
Eliminate fine scratches and create a smooth, uniform surface for glazing
Polishing (Optional)
This step is optional and can further enhance the final glazing result
4.Glazing
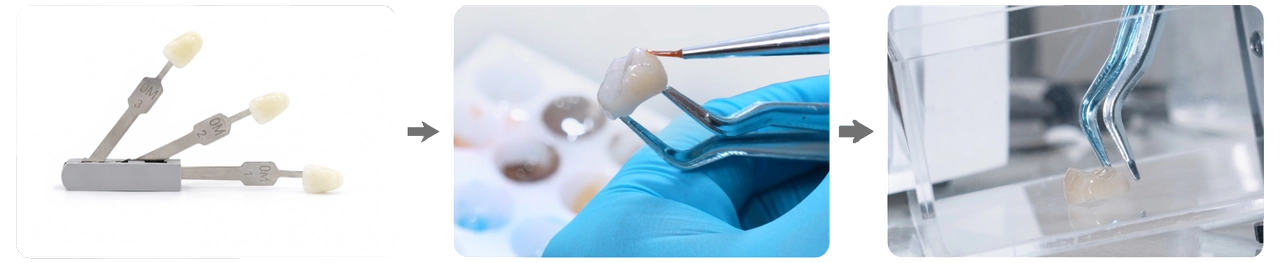
Select Shade Guide
Select the corresponding shade guide based on the clinical shade value
Glazing
Mix the glaze paste and start glazing
Curing
Complete glazing and proceed to curing Parameter Settings: PMW 30% 1 min
Note: These parameter settings are applicable to PioNext ceramic crown resin, for reference only
Finish