< img height="1" width="1" style="display:none" src="https://www.facebook.com/tr?id=1568787653269583&ev=PageView&noscript=1" />

Accelerate Production

Eliminate manual file transfers and reduce processing time, enabling instant printing when your designs are complete

Streamline Team Operations

Simplify task delegation across your team, ensuring smooth handoffs from design phase to final print

Intuitive Operation

Experience hassle-free 3D printing with our seamless plug-and-play integration

Unlock Seamless Integration

PioNext & 3Shape

The integration between PioNext and 3Shape Produce creates a faster, more connected digital workflow for dental professionals. With this powerful integration tool, you can seamlessly transfer designs created in 3Shape Unite Apps directly into PioNext CAM software in just a few clicks—ready for production on your PioNext 3D printers.

Experience a new level of productivity with a streamlined solution designed to make digital dentistry more efficient than ever before.

Step by Step integration


Step 1: Update Your 3Shape Unite Software

Before you begin, ensure your 3Shape Unite software is updated to the latest version for seamless integration and optimal performance. If you experience any issues during the update process, the 3Shape technical support team is available to provide prompt assistance and help resolve any update-related concerns.


Step 2: Set Up PioNext Box Slicer

To establish a seamless connection between your PioNext Box Slicer, PioNext 3D Printer, and the 3Shape ecosystem, begin by downloading and installing the most recent version of PioNext Box Slicer software.


Step 3: Set Up PioNext Box

After installation, restart your computer to finalize the setup. This reboot is essential for properly initializing the 3Shape server components and ensuring all integration elements are correctly configured. If use Halot Box please download Halot Box below.

Step 4: Connect PioNext 3D Printer

Open Machine Setup

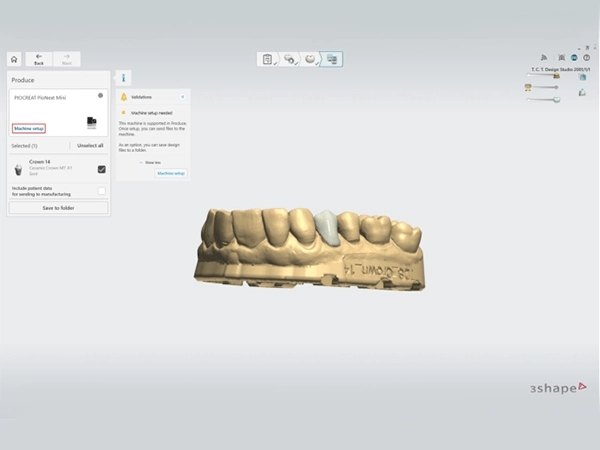
Once your design is complete in TRIOS Design Studio, navigate to the “Produce” menu in the top-left corner of the interface and click on “Machine setup.”

Add Your Printer

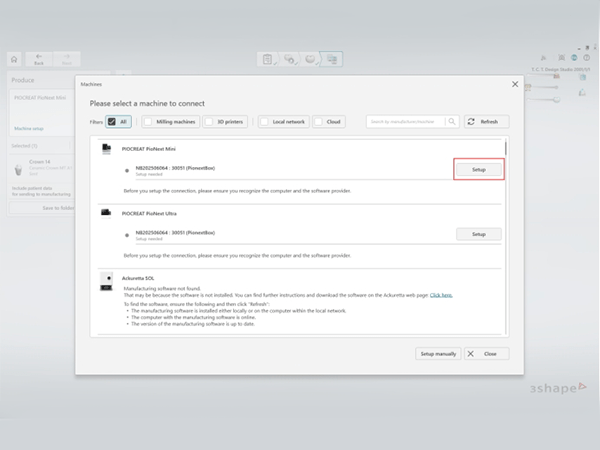
In the machine setup window, locate and select your PioNext 3D Printer from the available options, then click the “Setup” button to register it within the system.

Confirm Successful Integration

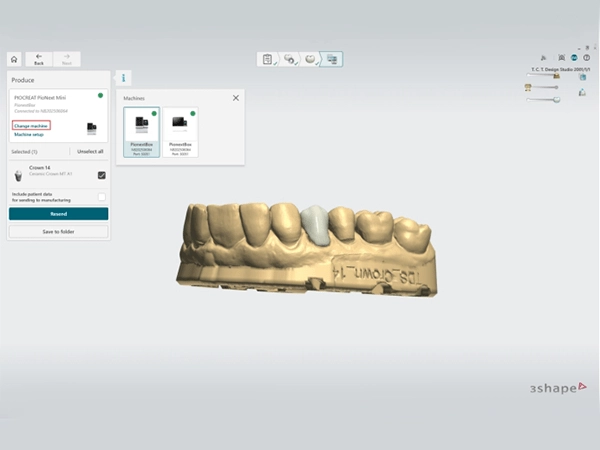
Allow a few moments for the system to establish the connection. When the integration is complete, a green indicator light will appear—signaling that your printer is successfully linked and ready for use.

Name
Country

PioCreat 3D Official Store