Table of Contents
Pellet Material Testing
Purpose: Adjust nozzle temperature and flow rate for current ambient conditions to achieve better printing results
A. Determining Optimal Nozzle Temperature
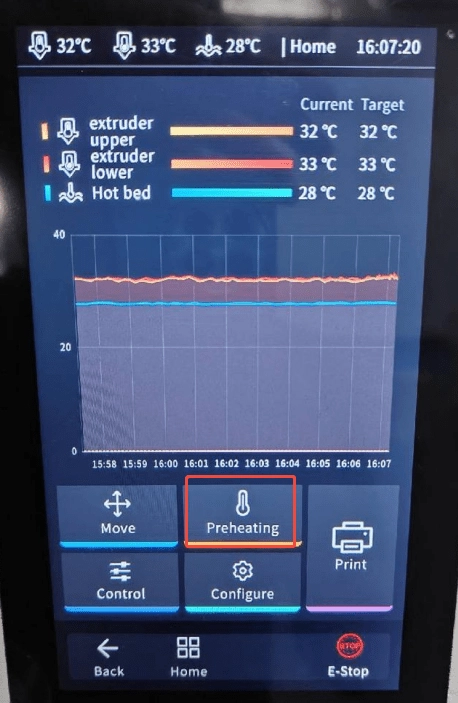
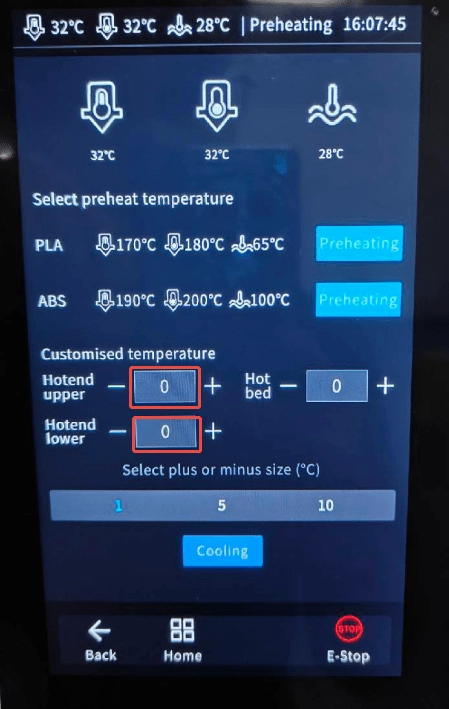
- Set Initial Temperature
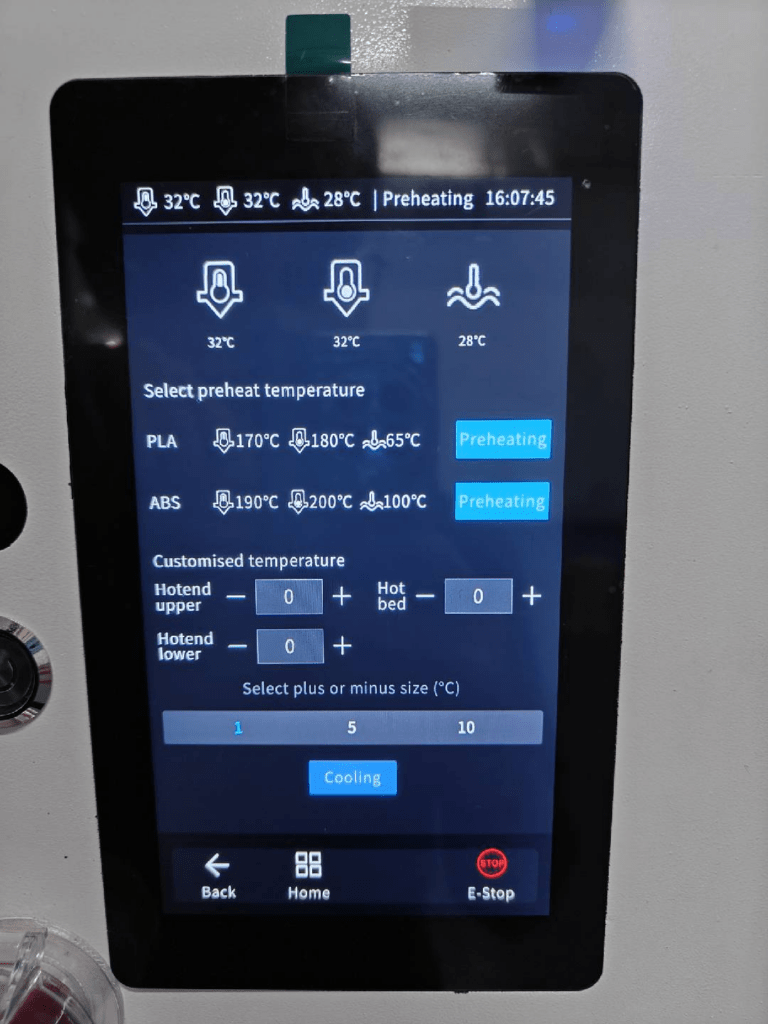
- Navigate to ‘Preheating’ Settings on the display.
- Input the recommended temperatures for Hotend upper and hotend lower
pellets | Hotend upper | hotend lower |
ABS | 160 | 190 |
PLA | 170 | 210 |
PETG-1211 | 180 | 220 |
PETG | 200 | 230 |
TPU(1.2 1.5 nozzle) | 160 | 190 |
TPU(2.0 3.0 4.0 nozzle) | 170 | 200 |
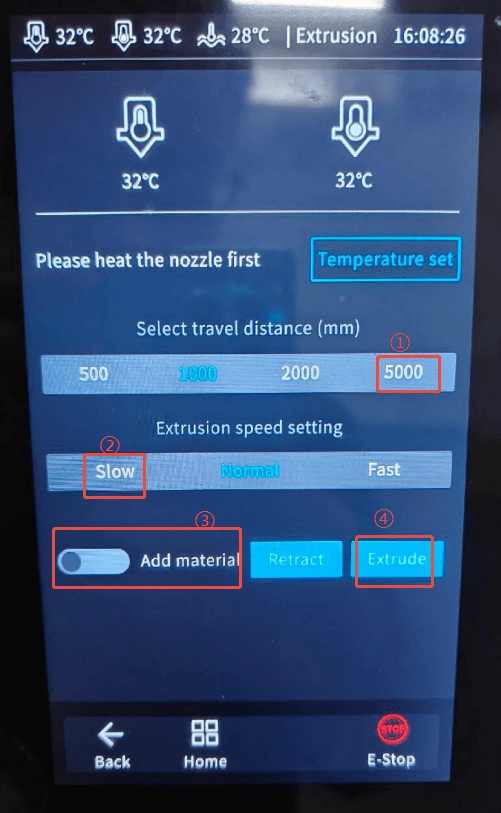
- Extrude Material
- After reaching target temps, set the ‘distance’ to ‘5000mm’, and the ‘speed setting’ to ‘Slow’.
- If the feed tube is empty: Click “Load Material”.
- Then select “Extrude”.

- Evaluate Extrusion Quality
- Ideal Output:
- Smooth, continuous flow without breaks/unmelted particles.
- Strong tackiness between layers.
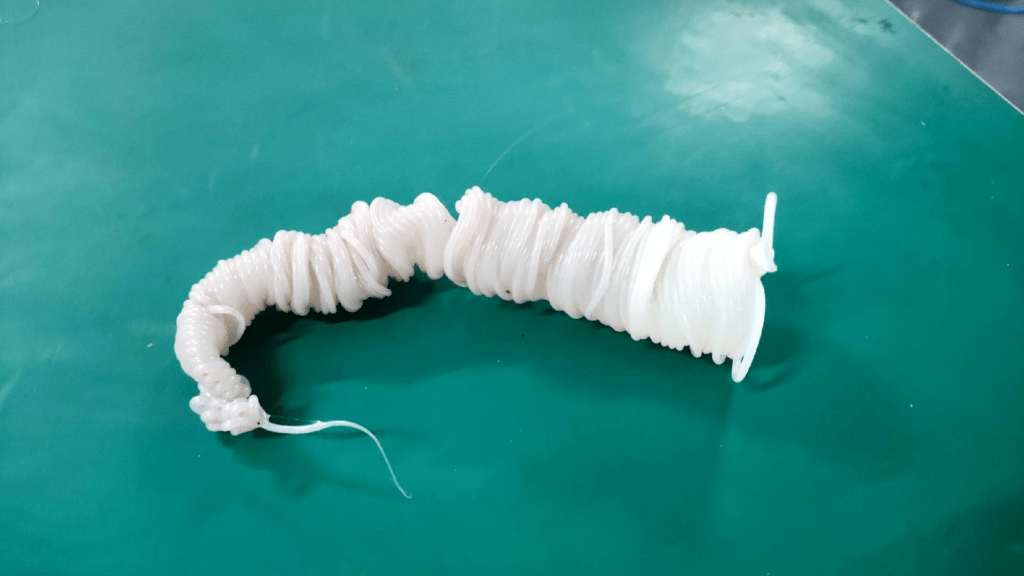
- Minimal oozing when idle.
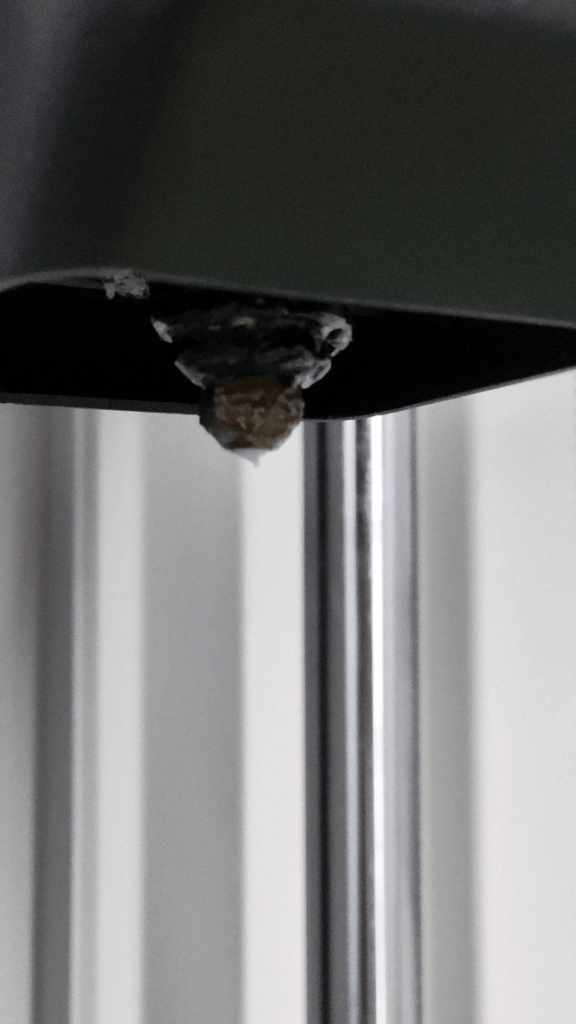
- Temperature Adjustment
- Too High: Excess oozing, rough surface texture → Lower by 5–10°C.
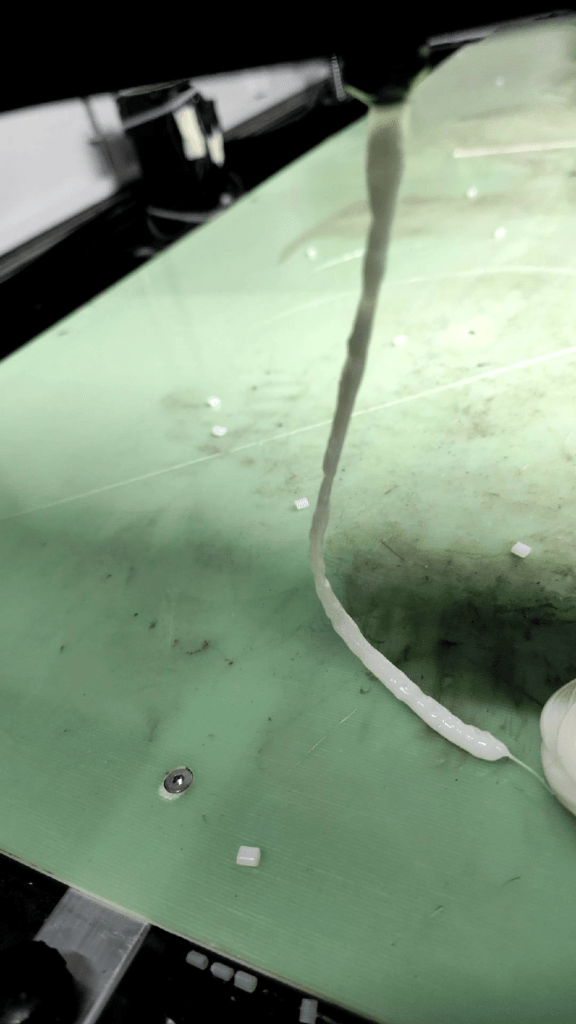
- Too Low: Grinding noise from extruder, weak layer adhesion → Increase by 5–10°C.
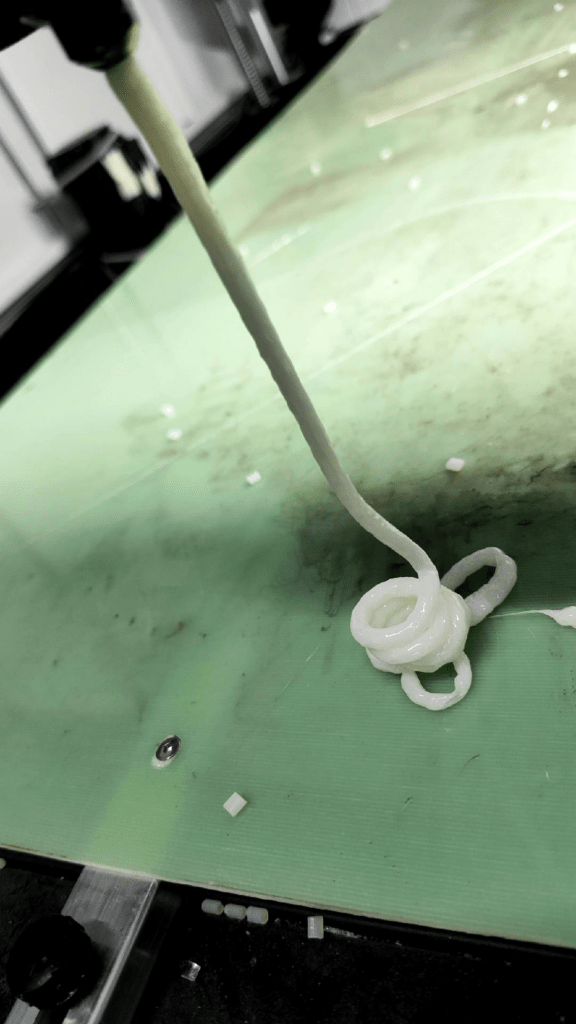
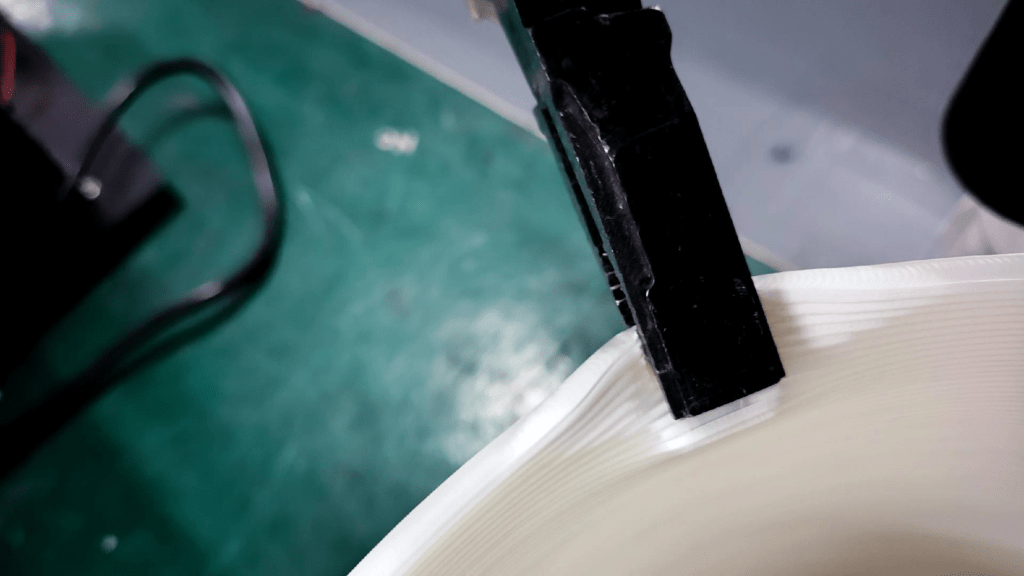
- Check for Moisture
- Signs of Wet Filament: Popping/crackling sounds during extrusion.
- Bubbles inside extruded strands.
- Solution: Dry filament (or reduce temp as a temporary fix).
- Image: Wet filament exhibits foamy, porous strands.
| Common material drying parameters | ||
| pellets | Temp (°C) | Time (h) |
| PLA | 50 | 1 to 3 |
| PETG | 60-70 | 2 to 4 |
| ABS | 80 | 2 |
| TPU | 95-110 | 2 to 4 |
Others pellet | Temp(°C) | Time (h) |
ABS | 80 | 3 |
PC | 120 | 3 |
PC/ABS | 100 | 3 |
PA6 | 80 | 3 |
PA66 | 80 | 3 |
PA66GF35% | 80 | 3 |
PMMA | 80 | 3 |
POM | 100 | 3 |
PBT | 120 | 3 |
PPO | 100 | 3 |
PPS | 150 | 3 |
PET | 125 | 3 |
PPE | 100 | 3 |
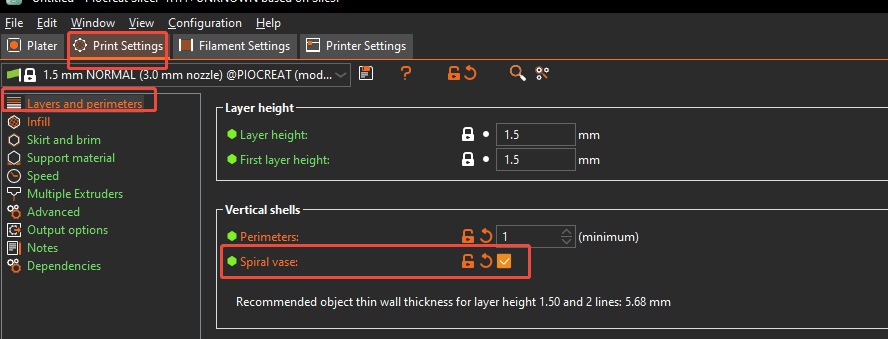
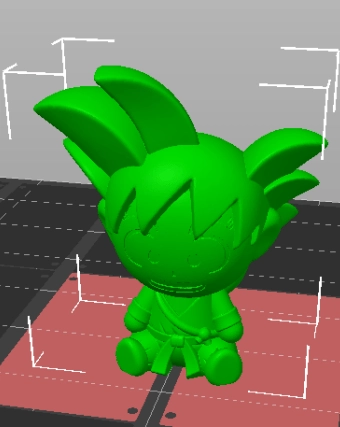
- Validation Print
- Print a hollow cube/cylinder in “Spiral vase”.
- Use pliers to bend the model 90° — if it doesn’t crack, the temperature is optimized.
B. Flow Rate Calibration
Reference Video: Start at 0:43.
Slicing Software Techniques
A. Nozzle Selection Guidelines
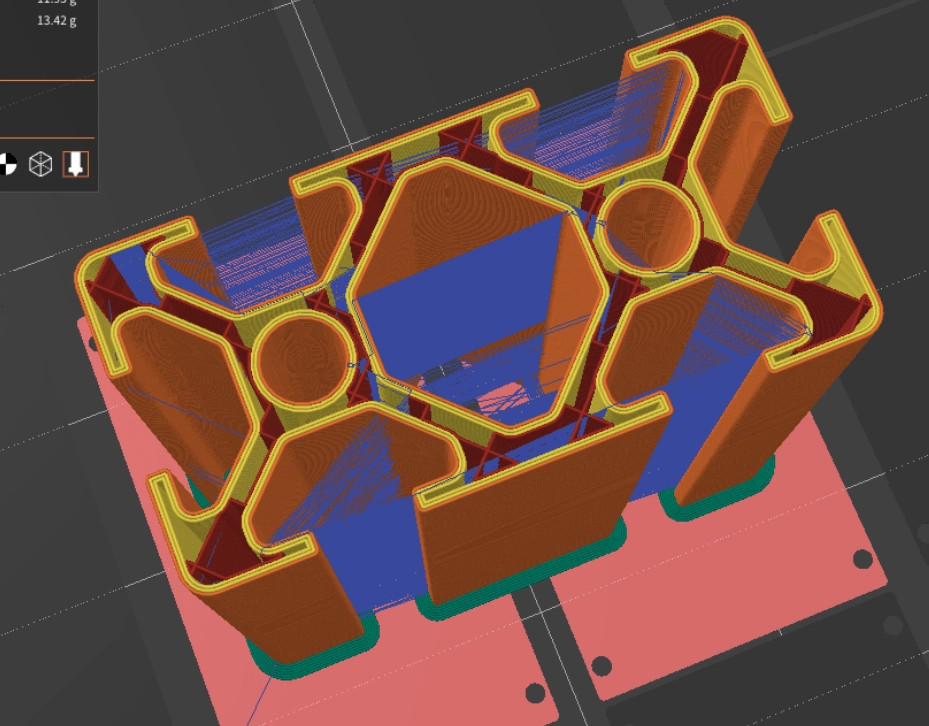
- Thin-Walled Models
- Problem: Small wall thickness can cause over-extrusion at corners, leading to layer defects or nozzle collisions.
- Solutions:
- Use a smaller nozzle diameter (e.g., 2mm instead of 3mm).
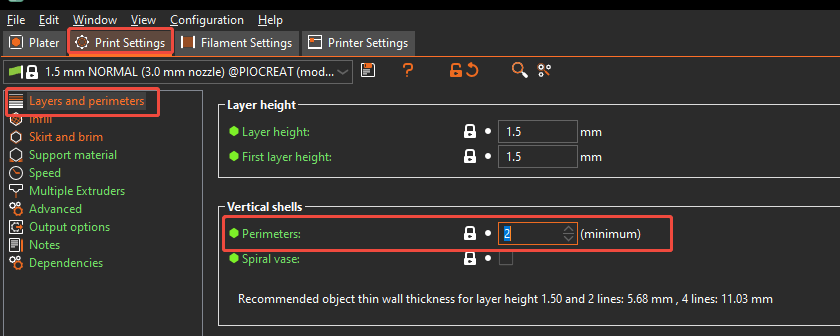
- Reduce ‘Perimeters’ to reduce wall layers:
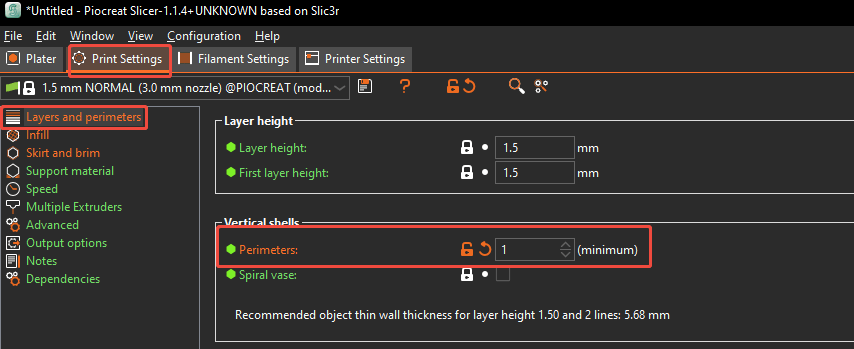
- Example: For a 12mm thickness shell, use:
- 2mm nozzle → 2 wall layers
- 3mm nozzle → 1 wall layer (to prevent excess material buildup).

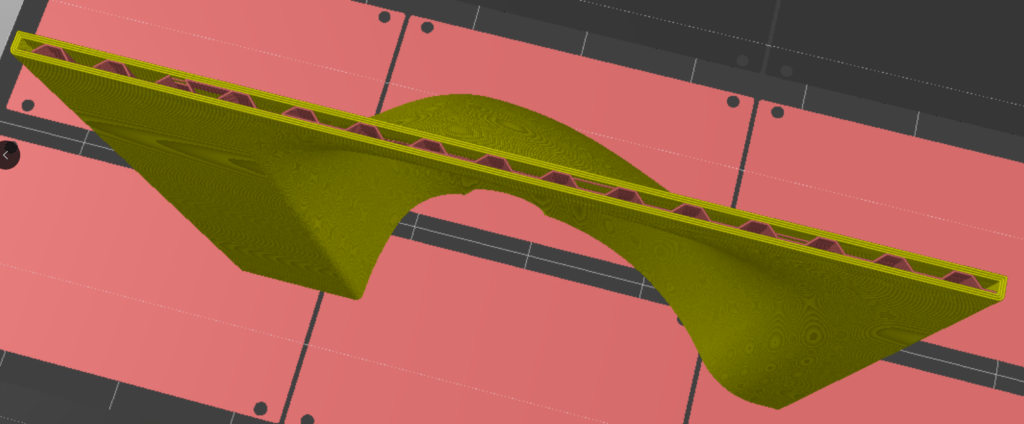
- Visual Comparison:
- Left:2mm nozzle (double extrusion at corners → bulging).
- Right:5mm nozzle (smooth transitions).
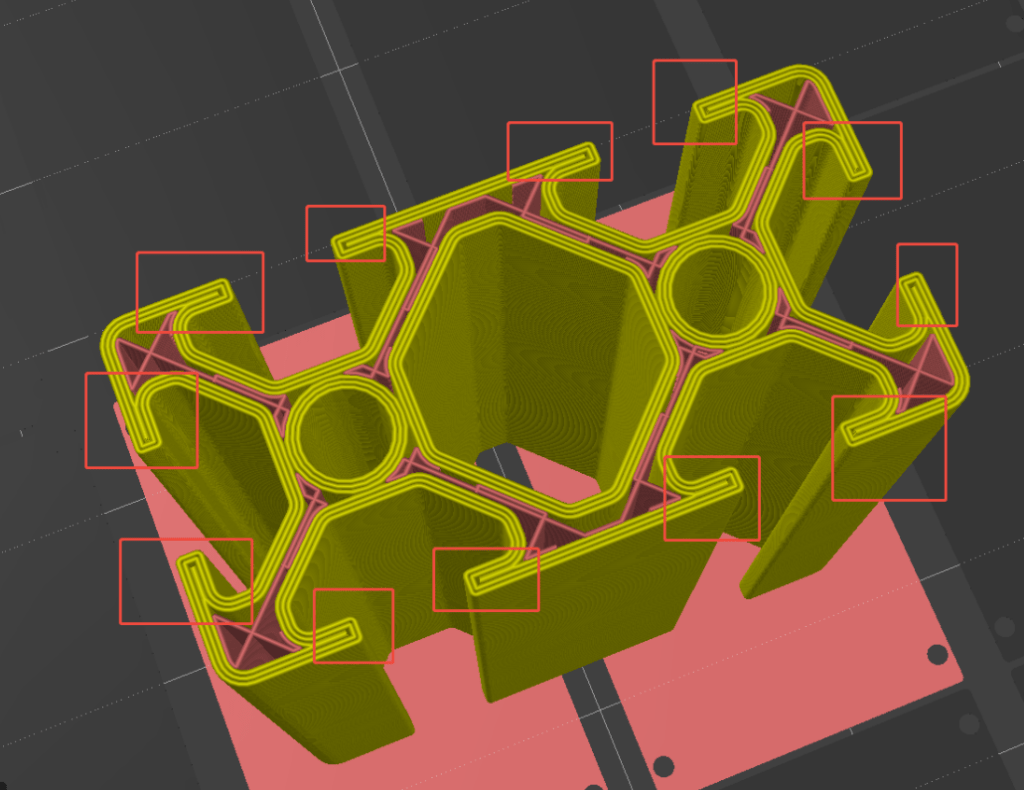
- Holes Near Edges
- Causes: Tight spacing leads to material buildup.
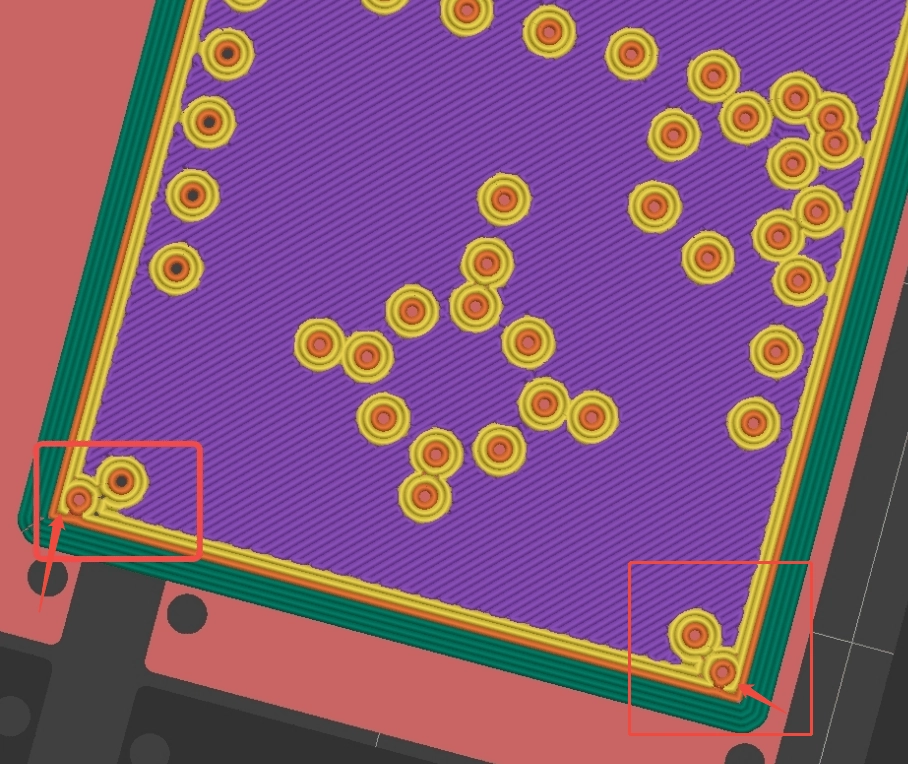
- Solutions:
- Reduce ‘Perimeters’ to 2.
- Switch to a smaller nozzle.
- Redesign model to increase hole-edge distance.
B. Special Model Optimization
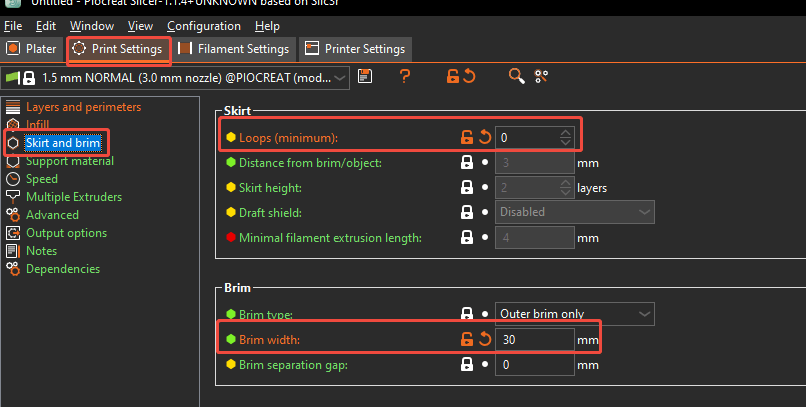
- Small Footprint + Tall Models
- Risk: Bed adhesion failure at higher layers.
- Fix: Apply glue stick or use a wide brim (10 times the nozzle diameter).

- Steep Overhangs (Drooping)

- Partial Solutions:
- Enable dynamic overhang speeds

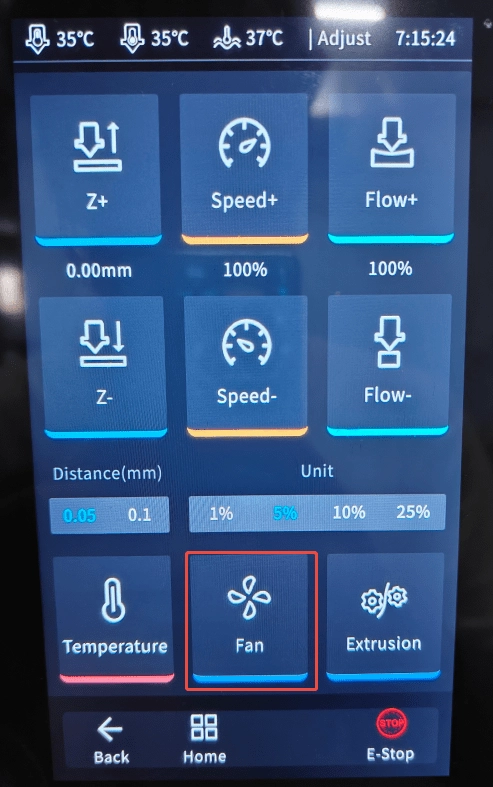
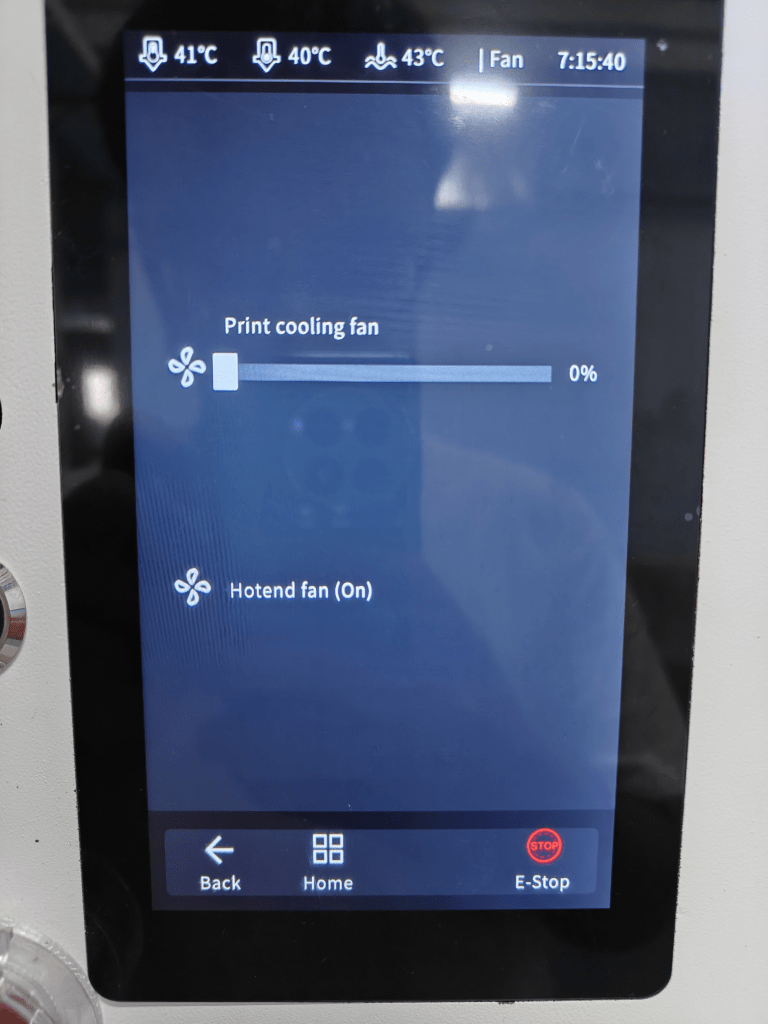
- Increase cooling fan speed (navigate to: ‘Adjuct’> ‘Fan’ during print).


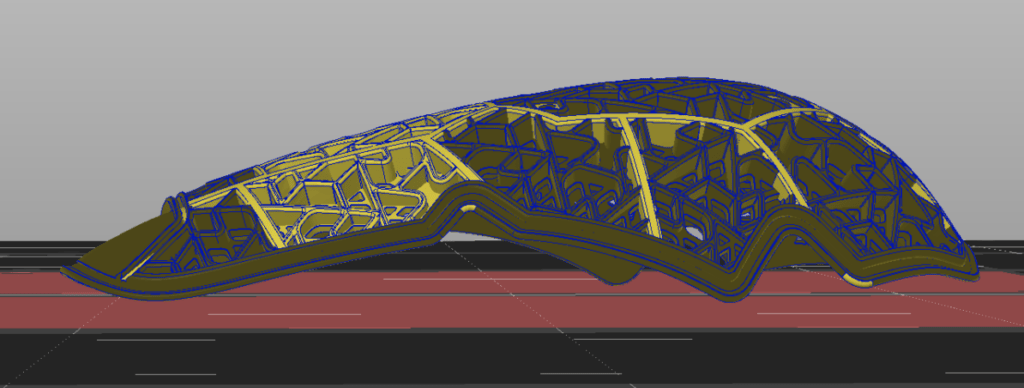
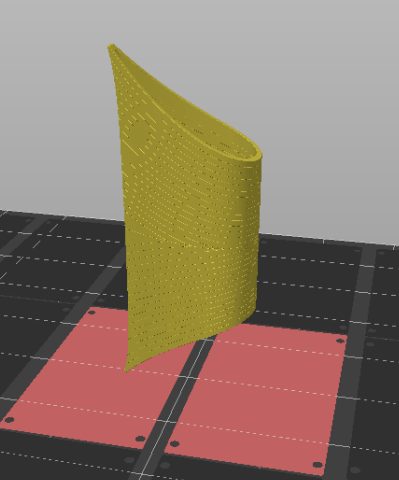
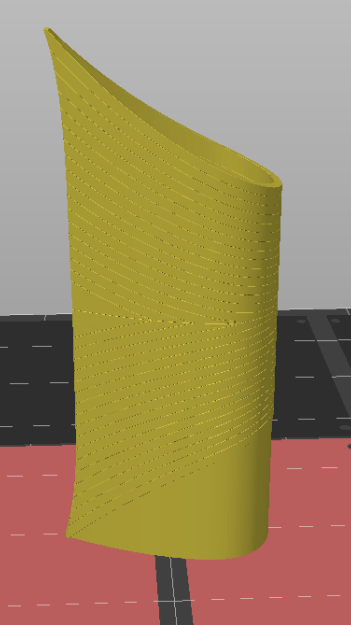
- Model Orientation
- Poor (Left):Requires excessive supports, prone to dropping.
- Better (Right):Optimized angle reduces supports and improves quality.

- Top-Heavy Models
- Stabilize with: Glue or a large brim.

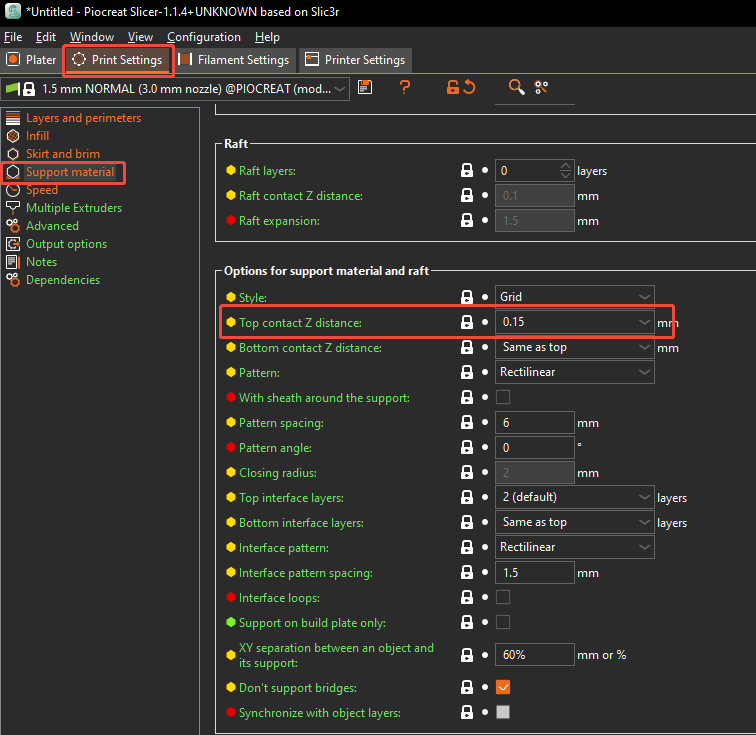
- Hard-to-Remove Supports
- Adjust support Z-distance (increase gap between support and model).
C. Design Adjustments for Printability
- Models with Minimal Bed Contact
- Redesign: Add a removable base for stability (avoids messy supports).
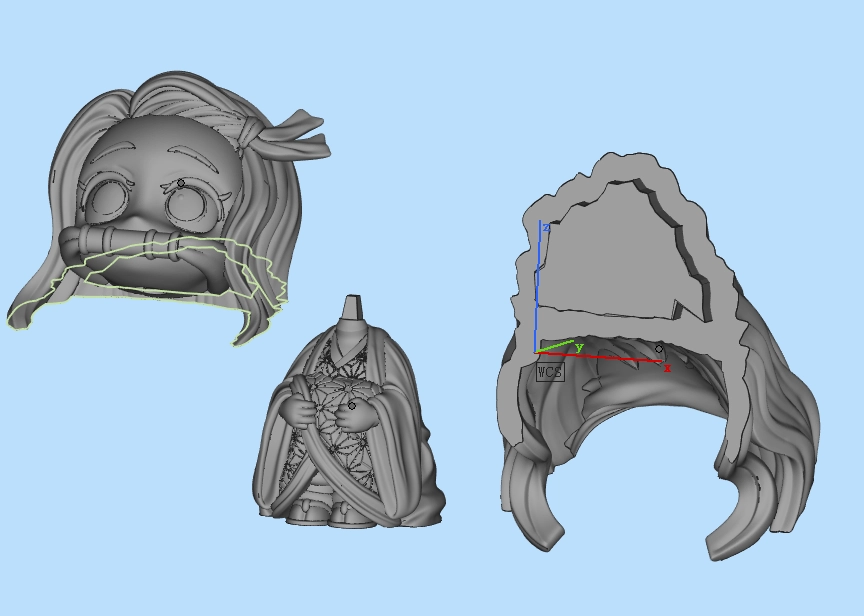
- Large, Support-Heavy Models
- Split into parts, print separately, and assemble post-printing.
- Irregular Bottom Surfaces
- Reposition vertically + add a custom support base + large brim.

Troubleshooting Common Print Failures
- Layer Separation
Causes & Solutions:
- Material Runout: Check if the filament spool is empty or jammed.
- Sensor Issues: Ensure the filament sensor isn’t stuck due to static electricity.
- Overheating: If the upper nozzle cools too slowly, the filament may gum up.
- Fix:Reduce upper nozzle temp by 5–10°C(navigate to: ‘Adjuct’ > ‘Temperature’ during print).


- Over-Extrusion
Solutions:
- Material-Specific Settings:
- TPU/Soft Filaments:Disabled retraction (causes clogs). Minor over-extrusion is normal for pellet printers.
- Retraction settings:
- Use slicer’s default retraction settings for Piocreat pellets brand.
- Overheating:
- Fix:Reduce upper nozzle temp by 5–10°C(navigate to: ‘Adjuct’ > ‘Temperature’ during print).
- Flow Rate Check:
- Ensure flow calibration isn’t set too high.
- Nozzle Wear:
- Replace if the orifice is wider than slicer settings (e.g., 0.4mm nozzle worn to 0.5mm).

- Poor Layer Adhesion
Fixes:
- Increase Nozzle/Bed Temp:
- Raise by 5–15°C(navigate to: ‘Adjuct’> ‘Temperature’ during print).
- Drafts/Temperature Swings:
- Avoid AC/fans blowing directly on the printer.
- Diagonal Patterns/Wobble
Root Causes:
- Tall Model Instability:
- Add a large brim.

- Reduce print speed by 20–30%(navigate to: ‘Adjuct’> ‘Speed-‘ during print).


- Uneven Cooling:
- Ensure cooling fans evenly cover the model (avoid partial airflow).
- Mechanical Issues:
- Tighten belts, lubricate lead screws.
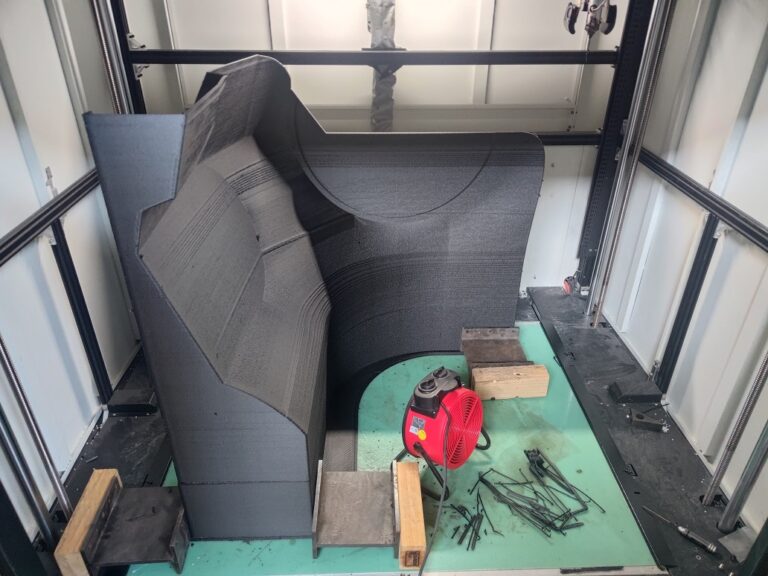
- Collapsing/Sagging
- Improve Cooling:
- Max out fan speed for overhangs (but avoid warping).

- Redesign:
- Add internal supports or split the model.
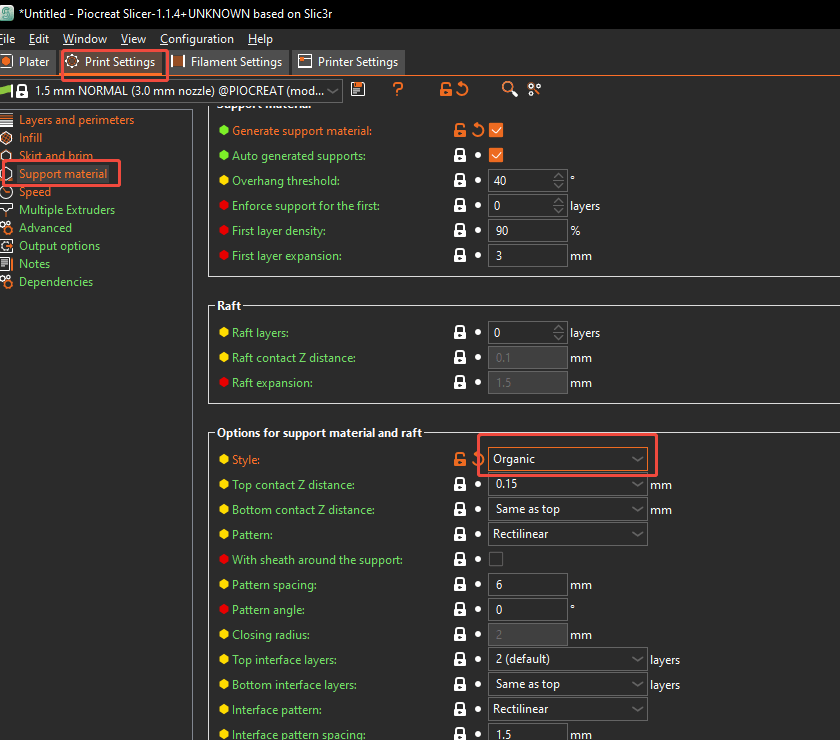
- Supports:
- Use Organic supports for complex model (easier to remove).